Published
- 3 min read
How To Convert Photo To Embroidery?
How To Convert Photo To Embroidery / Photostitch?
If you are new to embroidery sewing, you may have wondered how to turn pictures into embroidery. It is quite easy, but we need some programs for it. Some of these programs are free and some are paid. Today I am going to teach you how to embroider a picture on a t-shirt, shirt or fabric. I am going to use the Brother PE-11 program, but there are other programs available. I have researched and made a list of these programs, which you can check out on this page. I will show you step by step how to digitize and embroider pictures using the Brother PE-11. I even made a video for you. So We will create an Cute Harry Potter embroidery project together.
What is the Brother PE 11 Program and its features?
Brother is a major technology company in the world. It has many products, including printers, sewing machines, label makers, etc. Brother has developed a software, PE 11, to make your sewing and embroidery work easier. Using this software you can control your sewing machine and embroider the image you want. For this, you must first purchase the program.
Features:
- Photo Stitch
- Easy User Interface
- USB-sized Security Dongle
- Compatibility with ScanNCut
- Printing and stitching
- Mix gradients and colours
- Photostitch
- Cross stitch
- Layout and Editing Center – design embroideries, appliqués and more
- Design Center and Design Database, featuring more than 1000 built-in designs
- Font Creator with font import function
- Programmable stitch creator – create decorative fill patterns for quilting
- Stitch Design Factory – create your own unique decorative stitches
- Hundreds of built-in fonts
- New enhanced easy to use interface
- New WLAN function – send your designs wirelessly between your computer and your Innov-is Luminaire XP1
- New background fill with echo quilting
- New improved image tracing for photo stitch and auto punch
- More advanced editing functions like round fill stitch and flexible spiral stitch
- Original decorative fill creator
- Font mapping
- Updated thread chart
- More options for object alignment
- New convert region to line sewing
- Enhancements of PE-Design 10 features like Fabric Selector and Colour Palette Buy here
Price: ** £1,099.00 Inc. VAT**
- Step 1 : After purchasing and installing the program, you will see a screen like this.
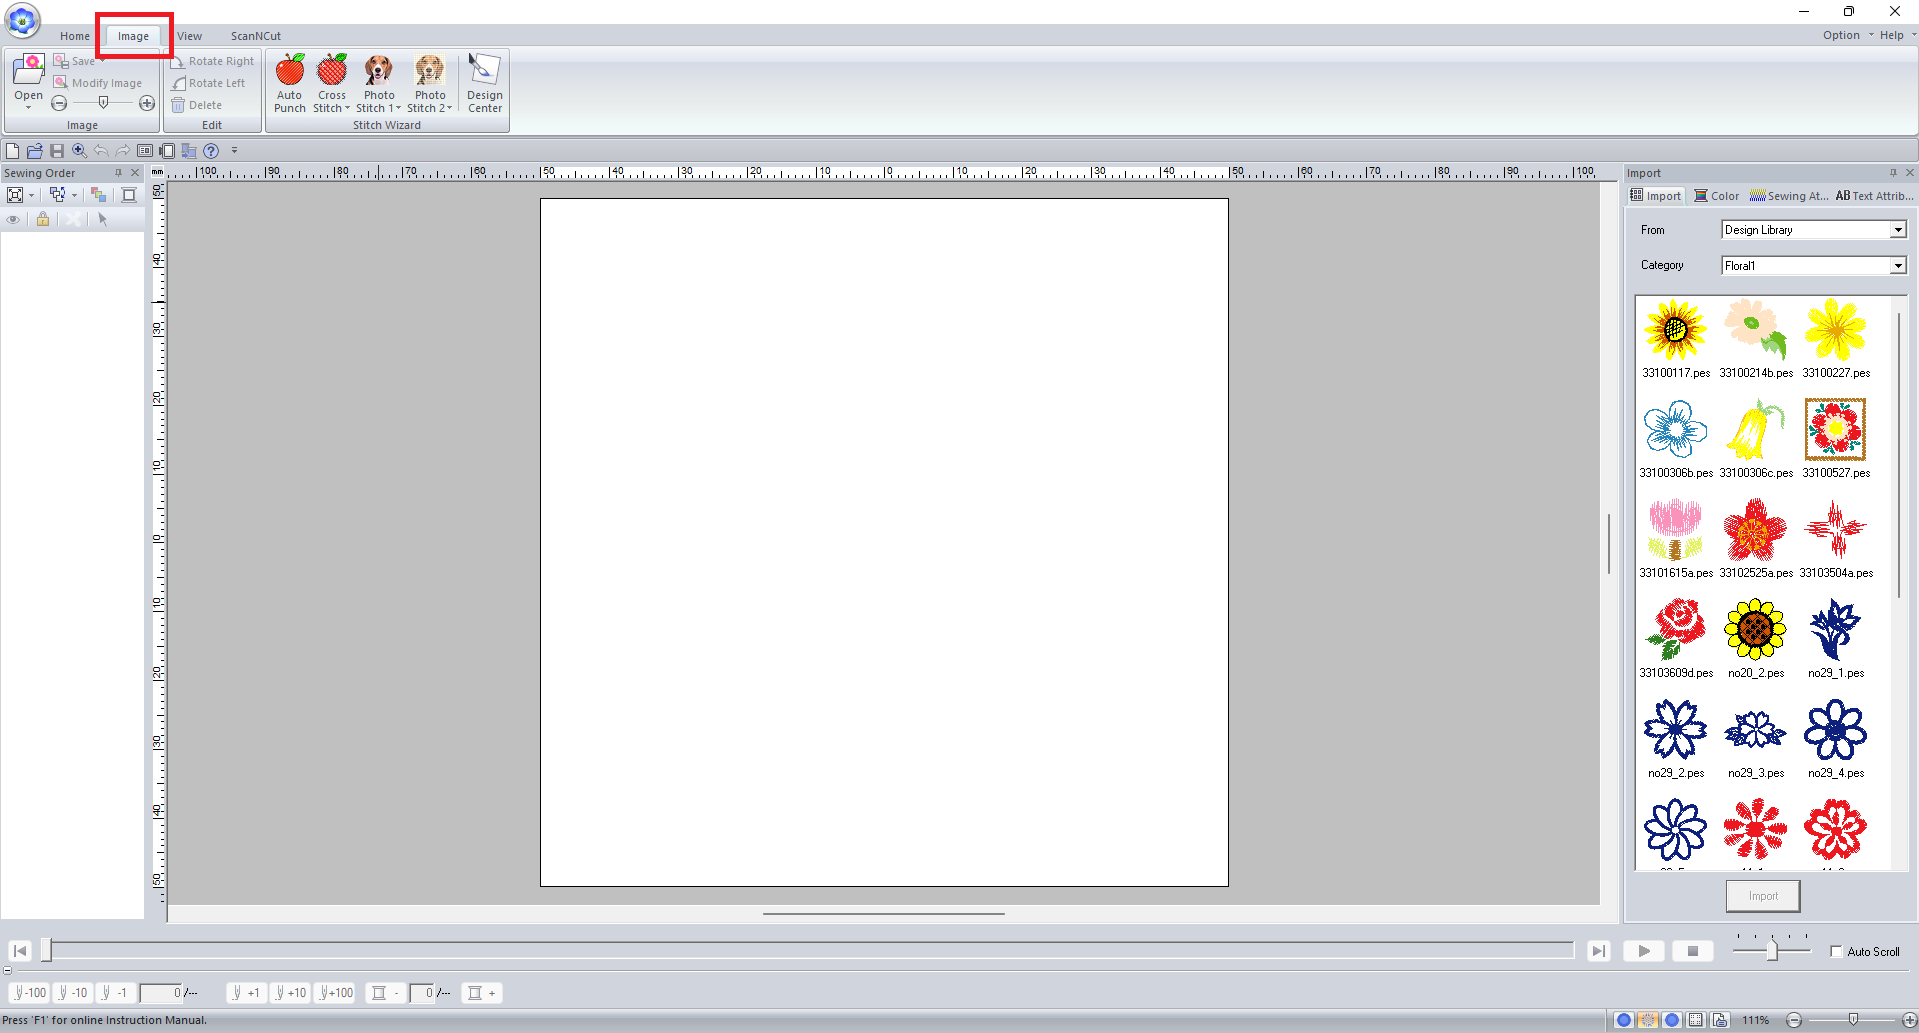
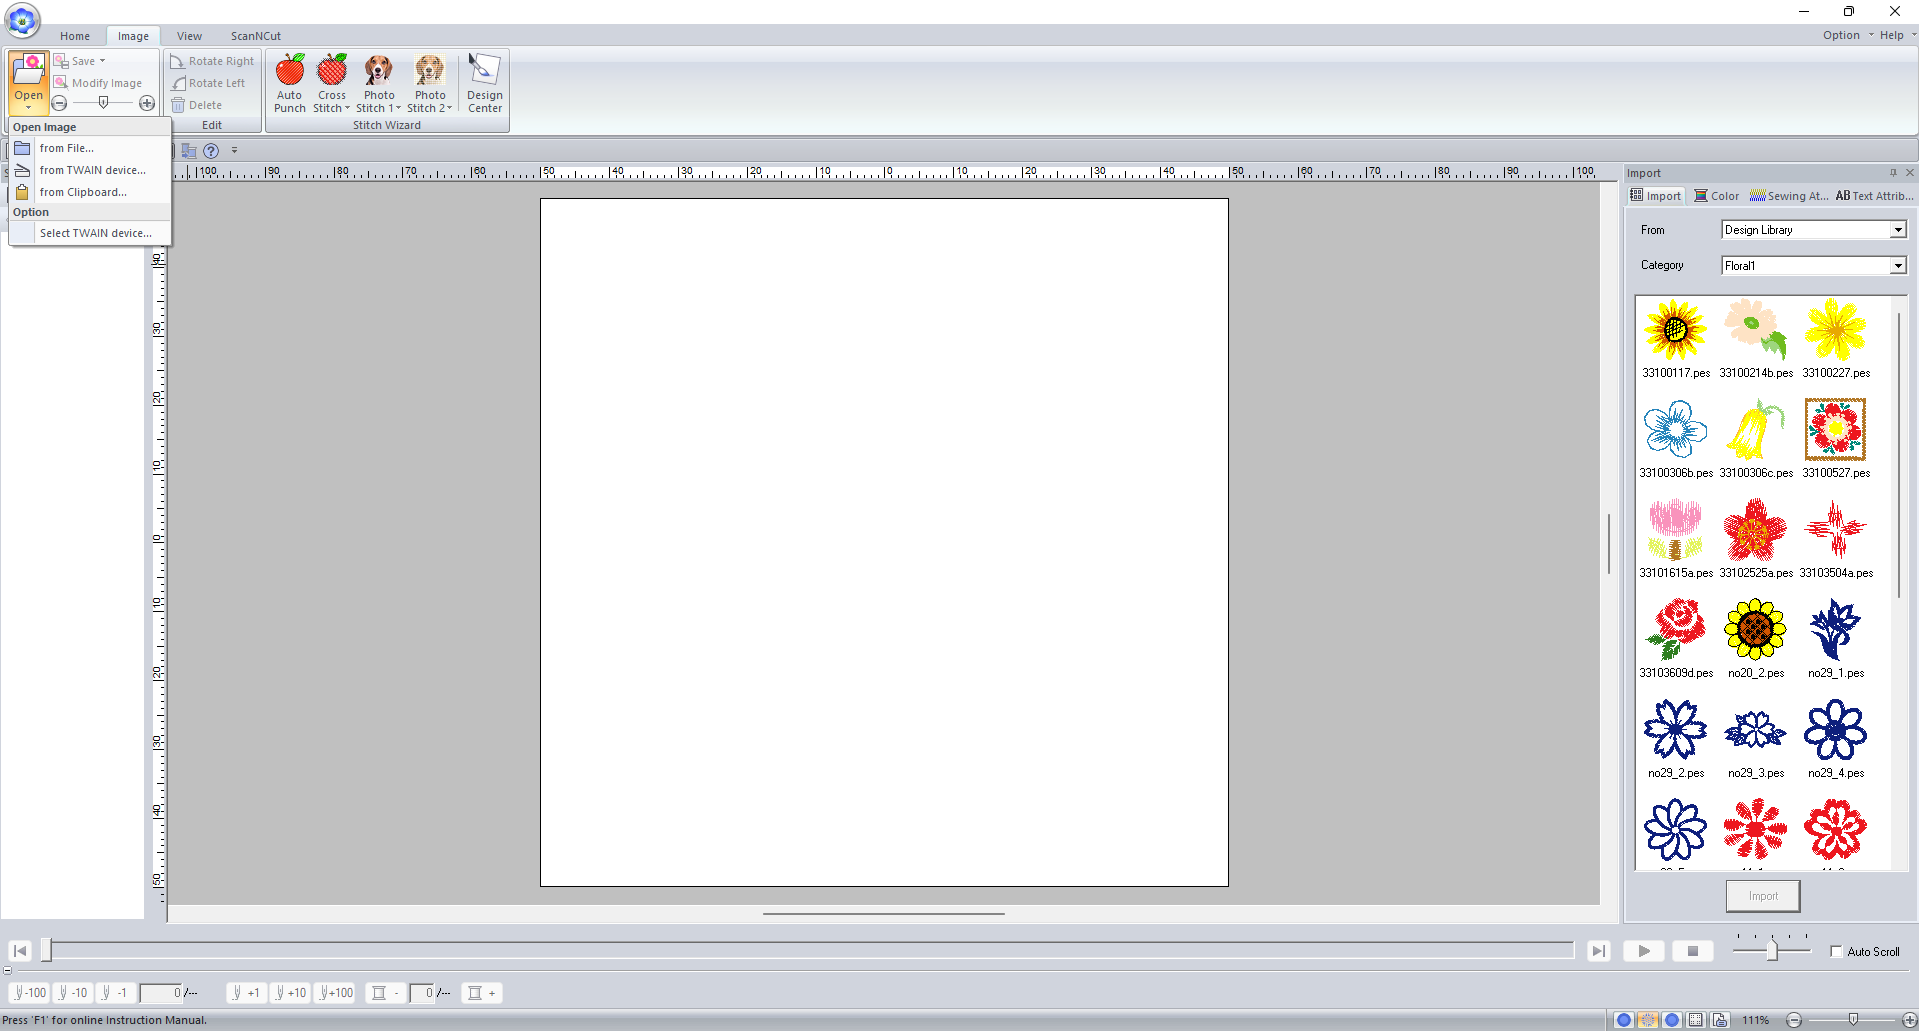
- Step 2 : First click on the Image tab in the top menu.
- Step 3 : Click on the Open button just below and then click on From File.
- Step 4 : Select the Photo you want.
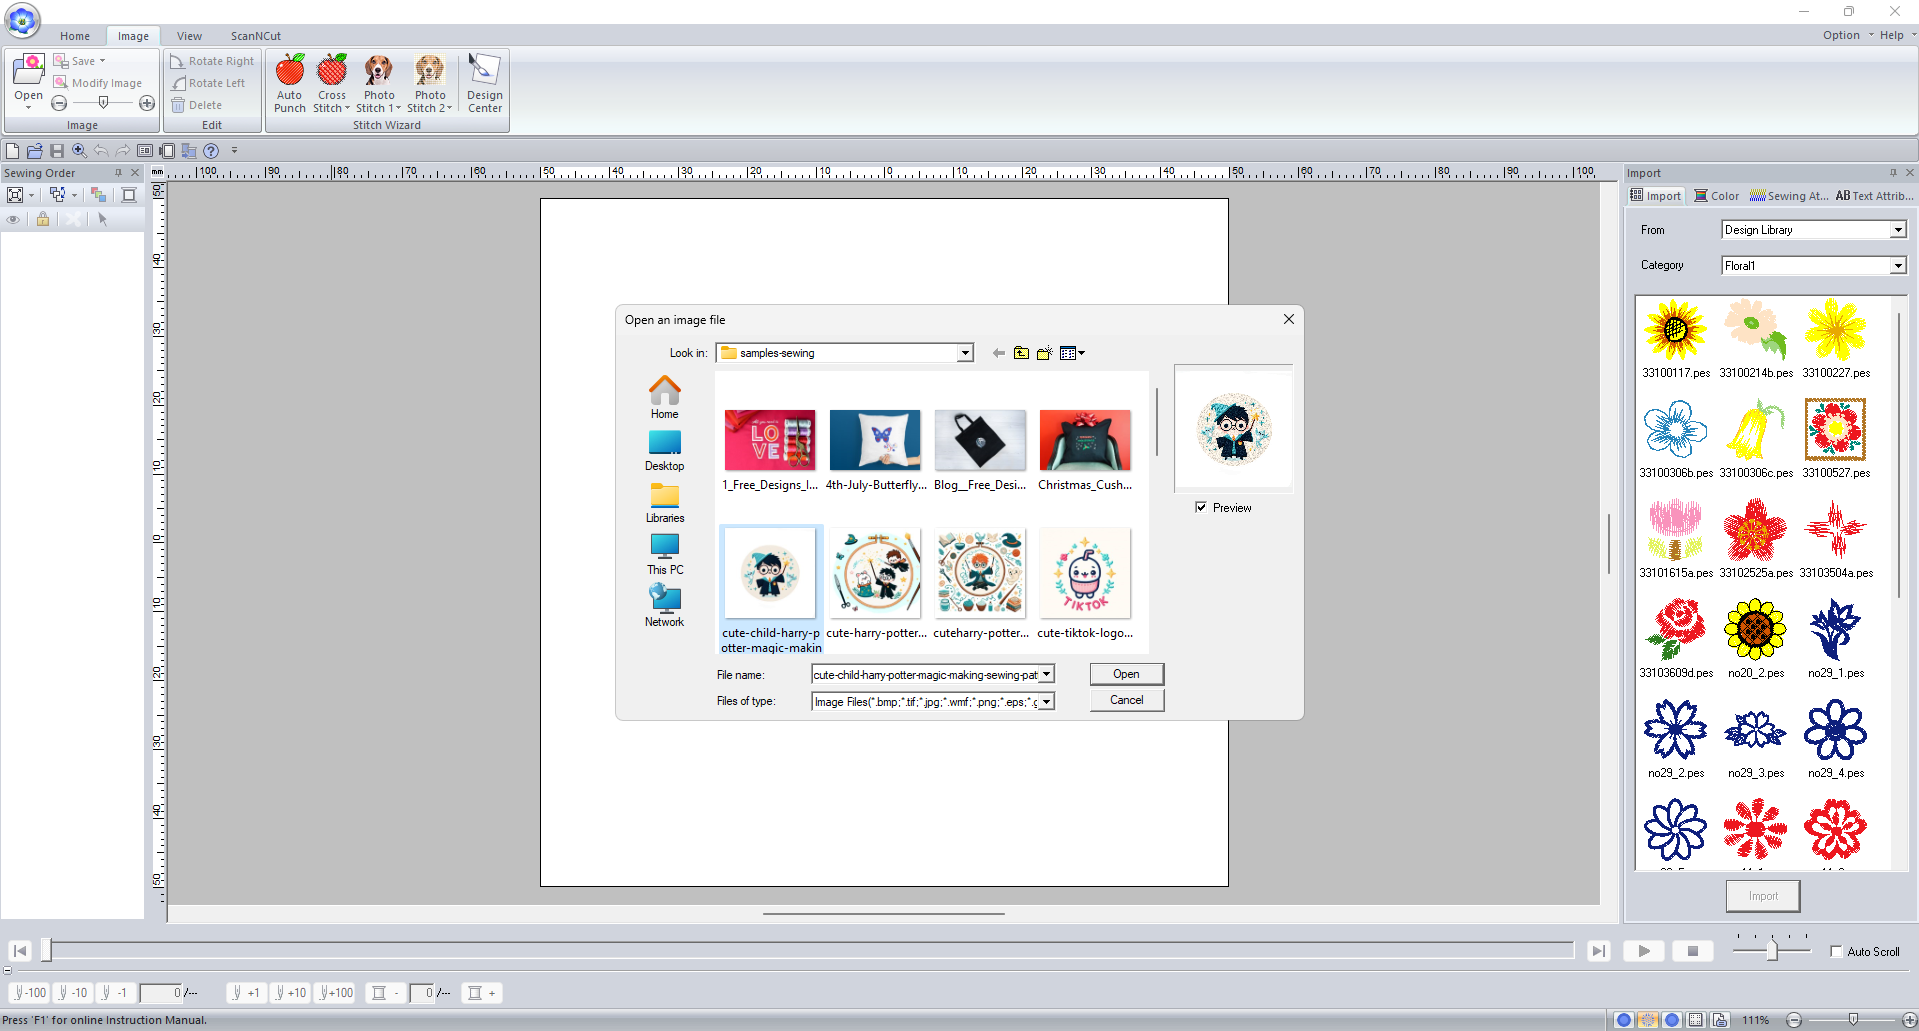
- Step 5 : Your picture will now appear on the home page.
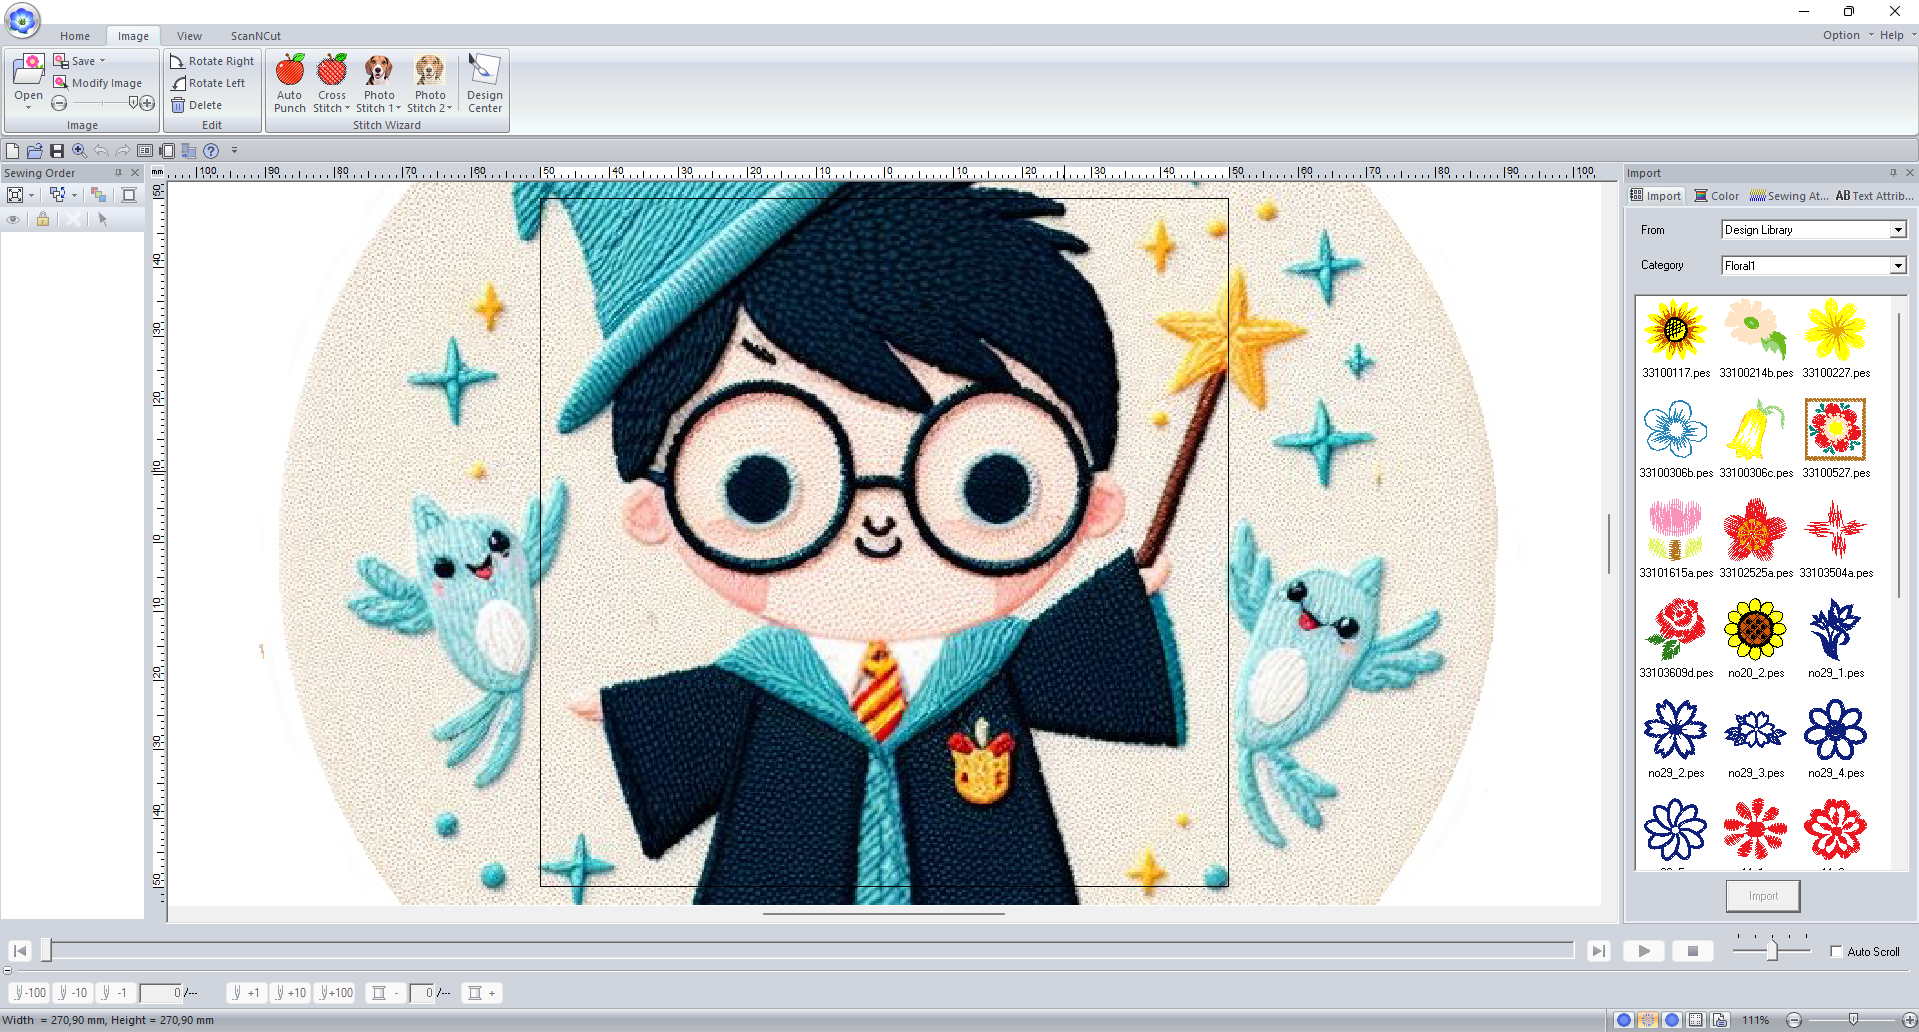
- Step 6 : Click on the Image tab again in the top menu.
- Step 7 : Then Click PhotoStitch after that click Color Button.

- Step 8 : Select Mask Window will appears.
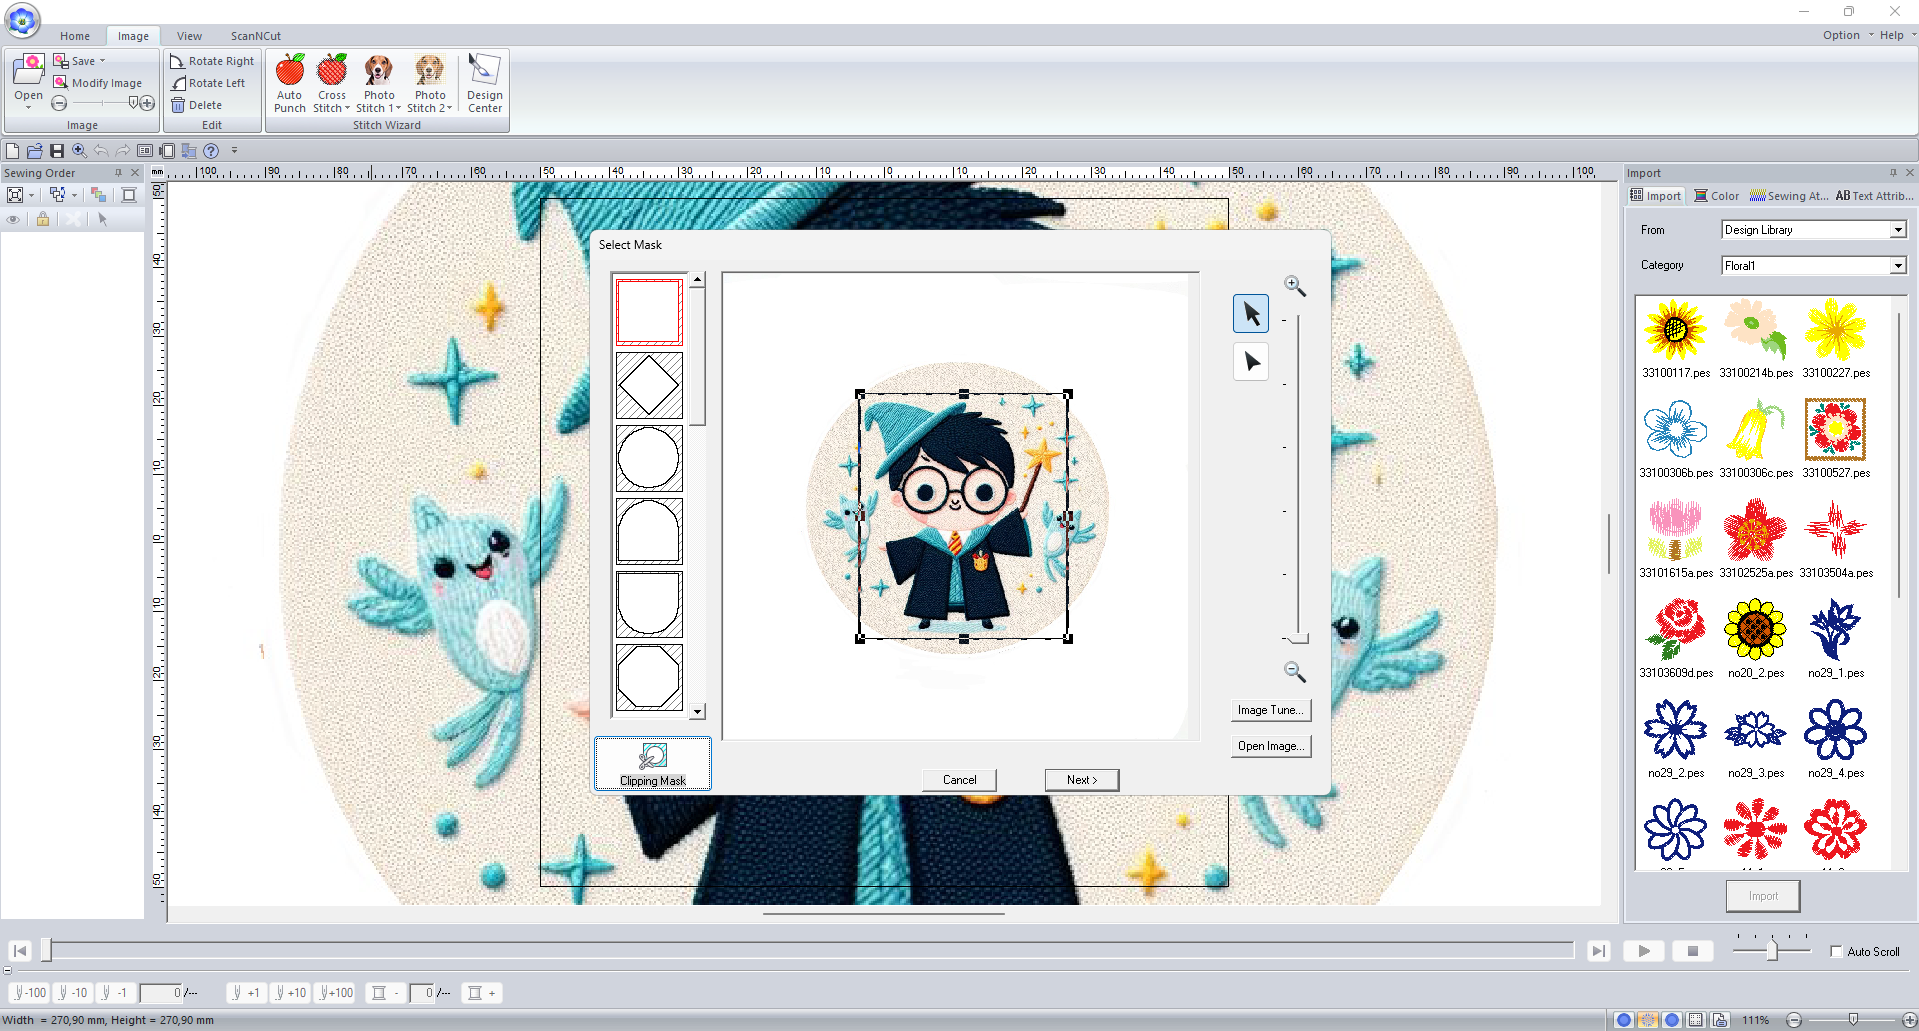
- Step 9 : Crop your photo if it is need, Then Click Next.

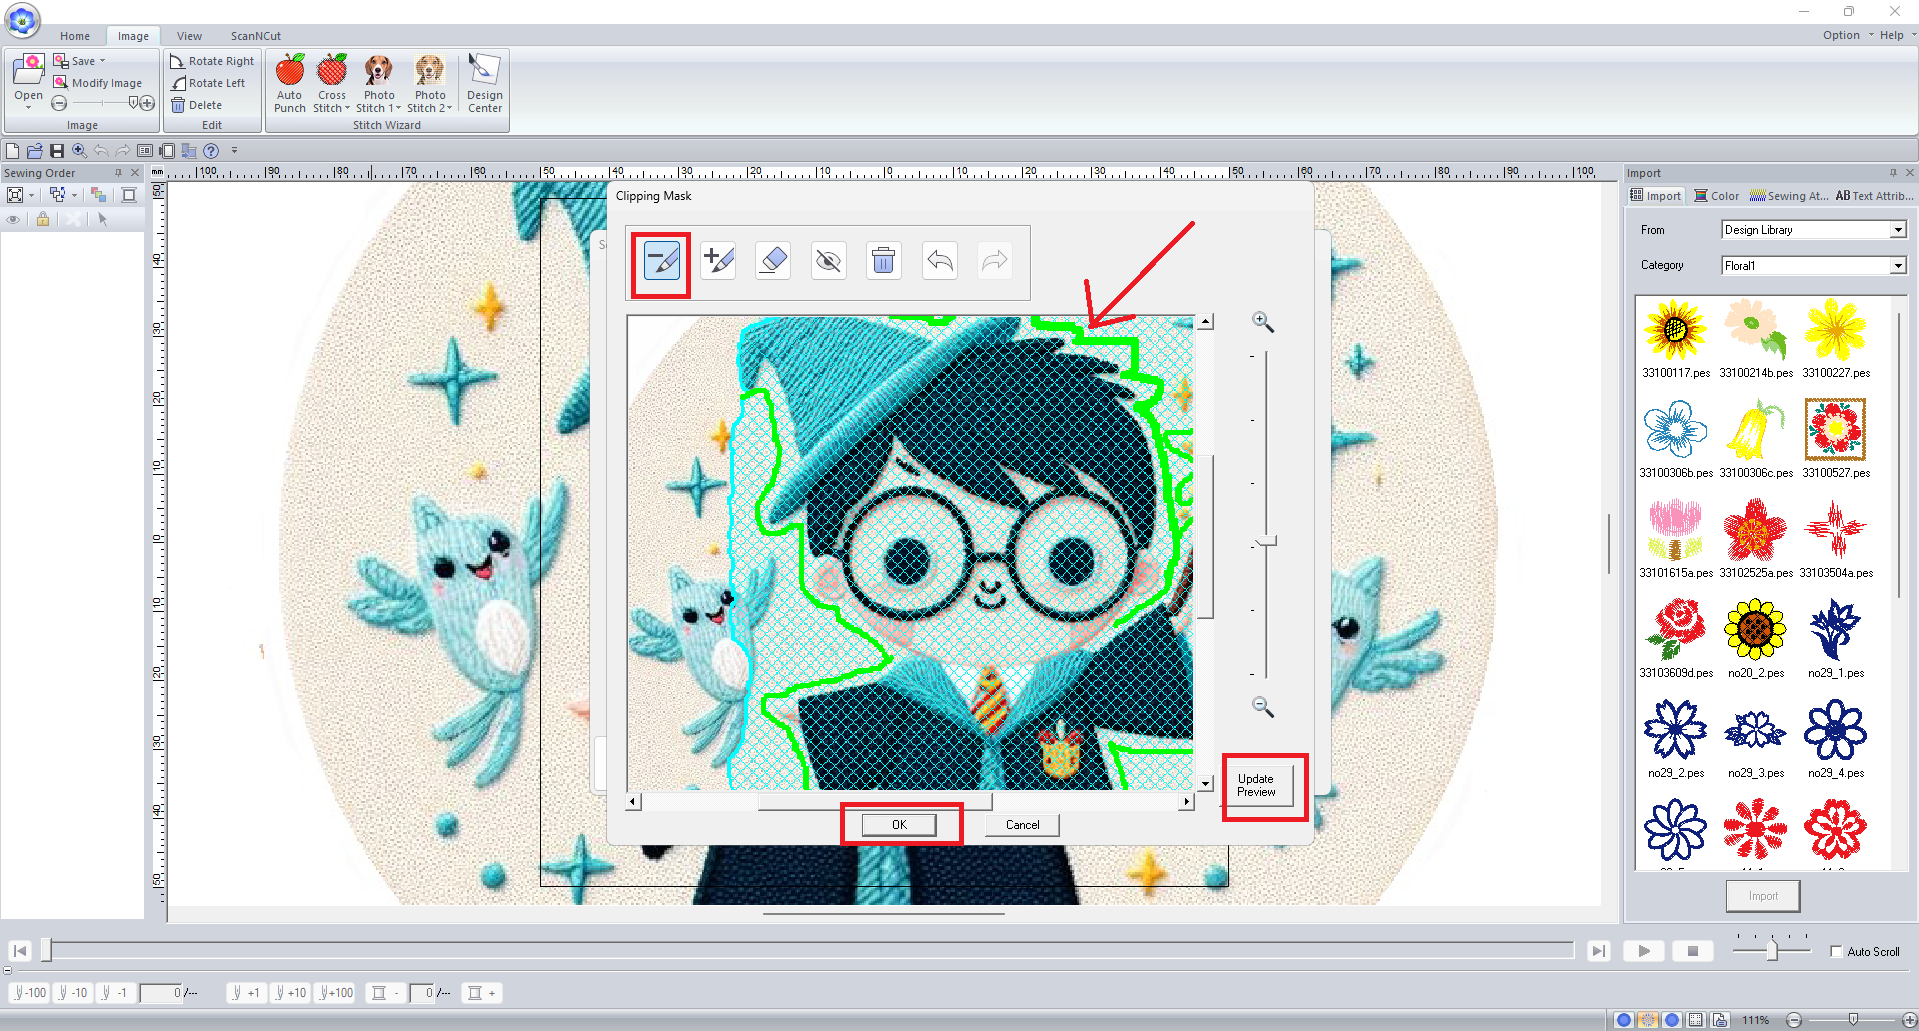
- Step 10 : Then Clipping Mask Window will appear you will edit your Image and Stitch Area
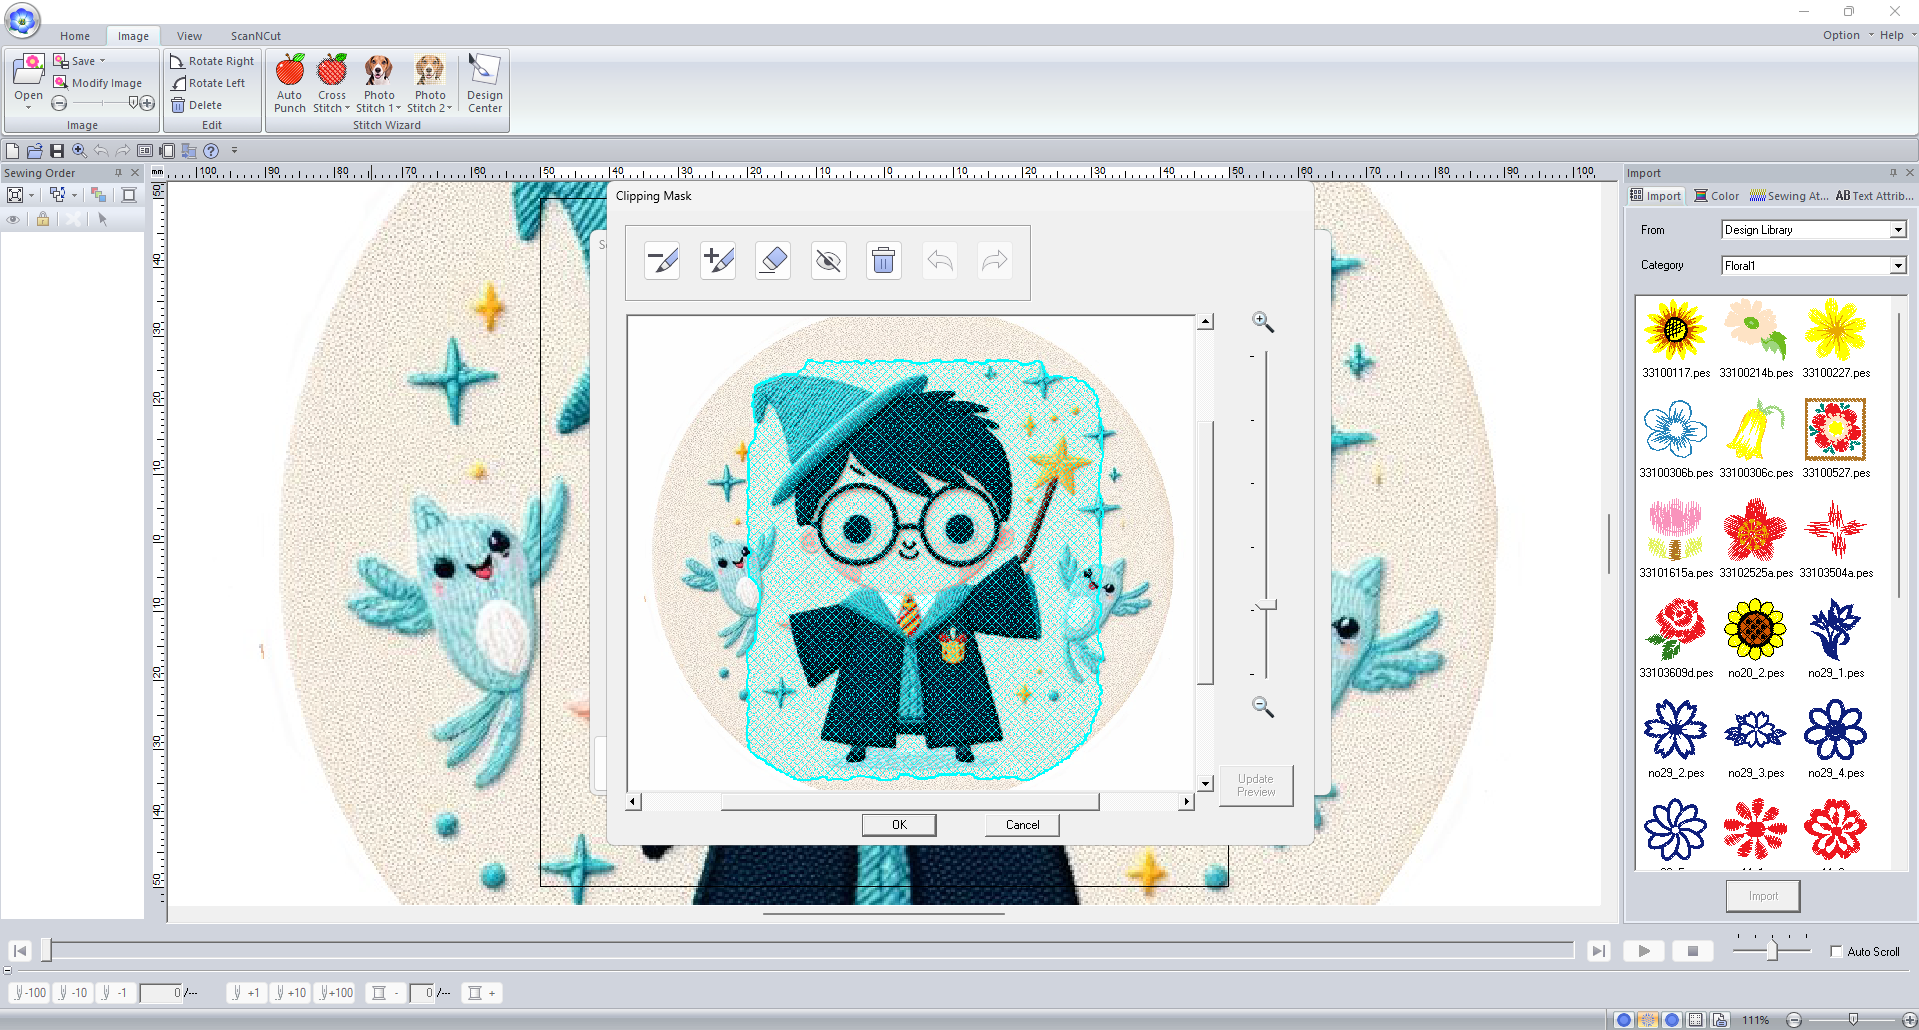
- Step 11 : Now You can delete/add stitch areas,by clicking plus or minus buttons. Then Click UPDATE PREVIEW Button then Click Ok
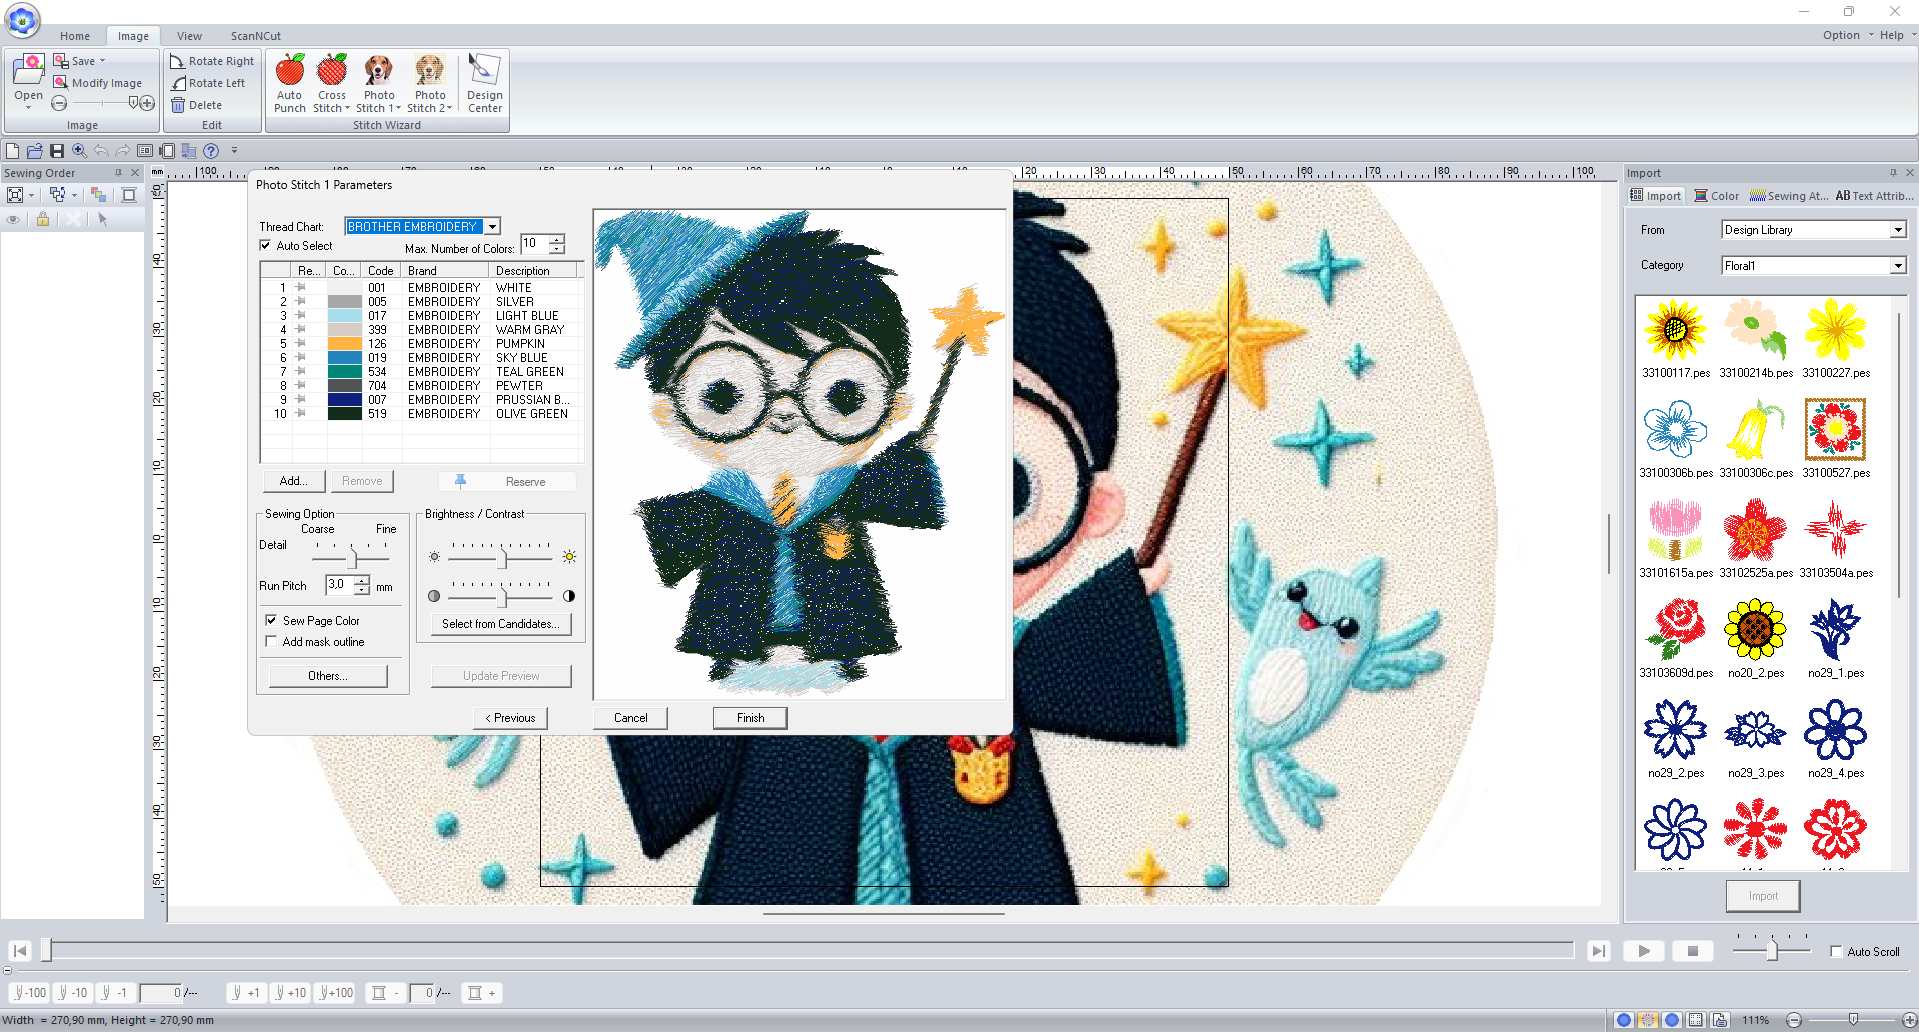
- Step 12 : Then You will see Parameters screen.Click Finish button or before click edit your design.
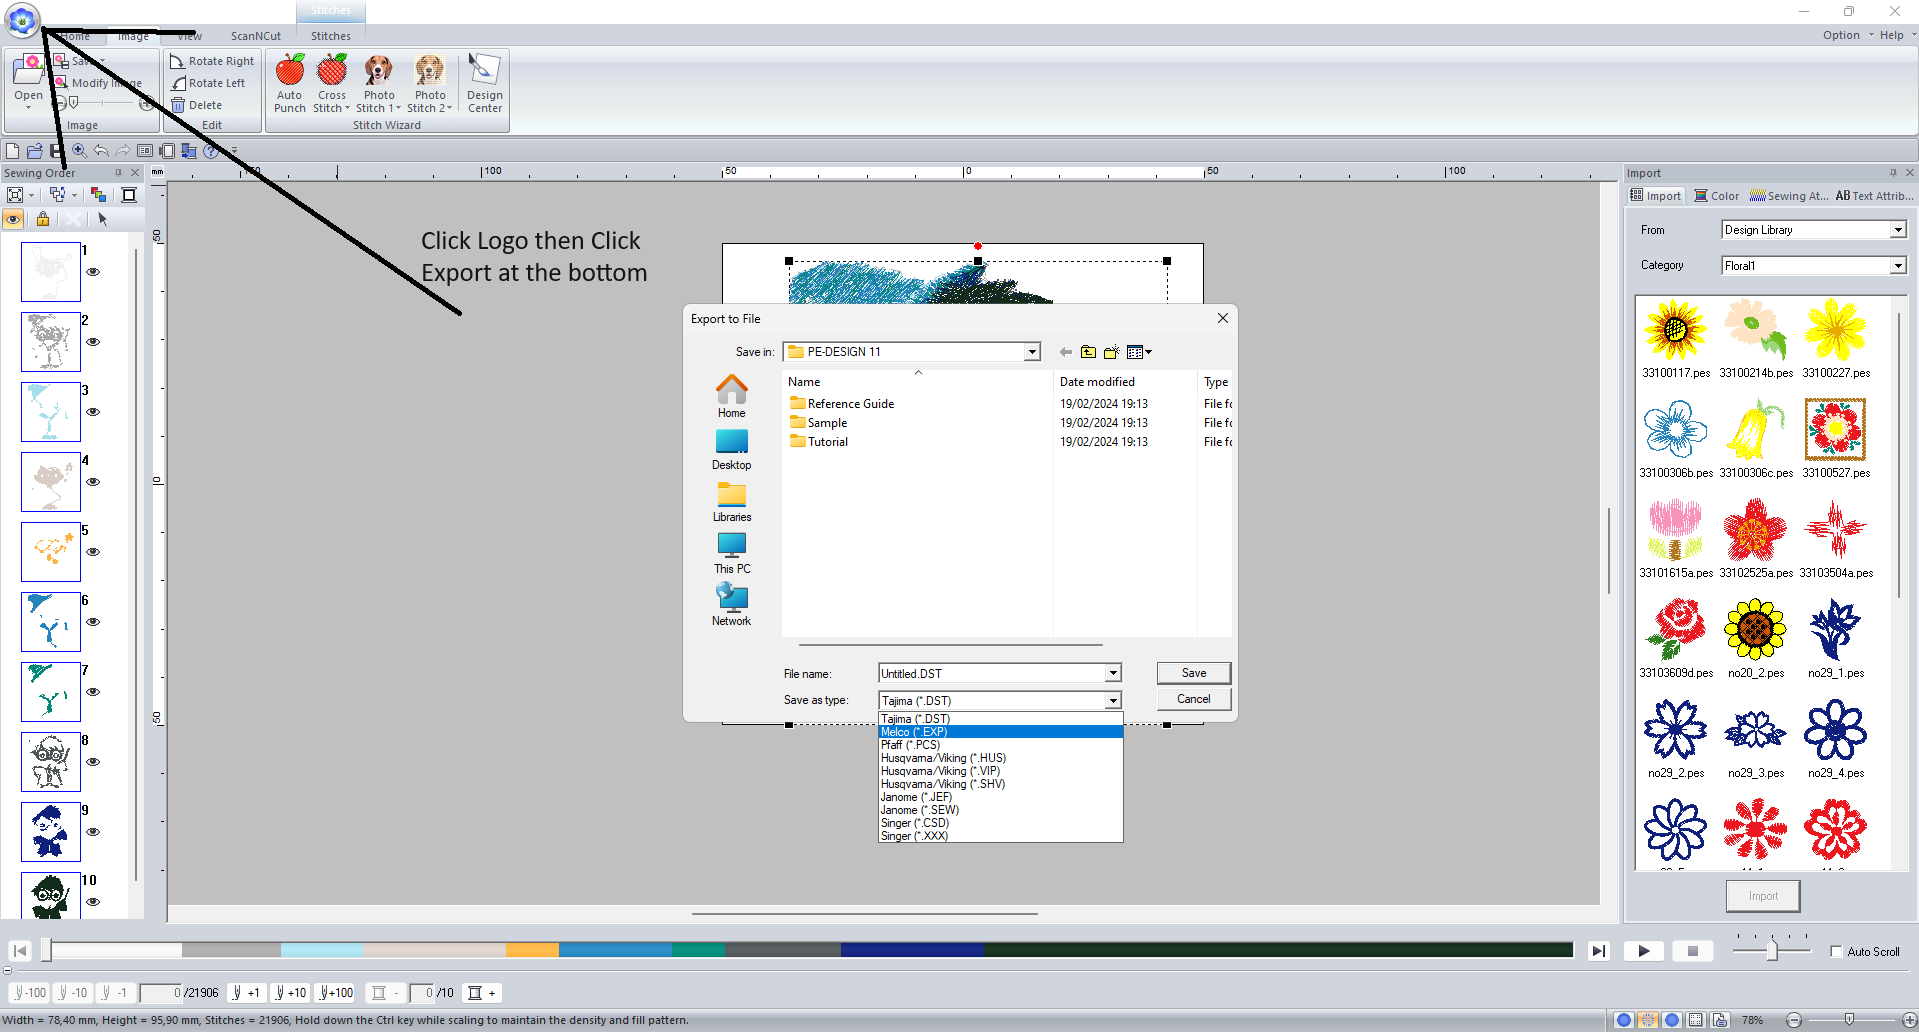
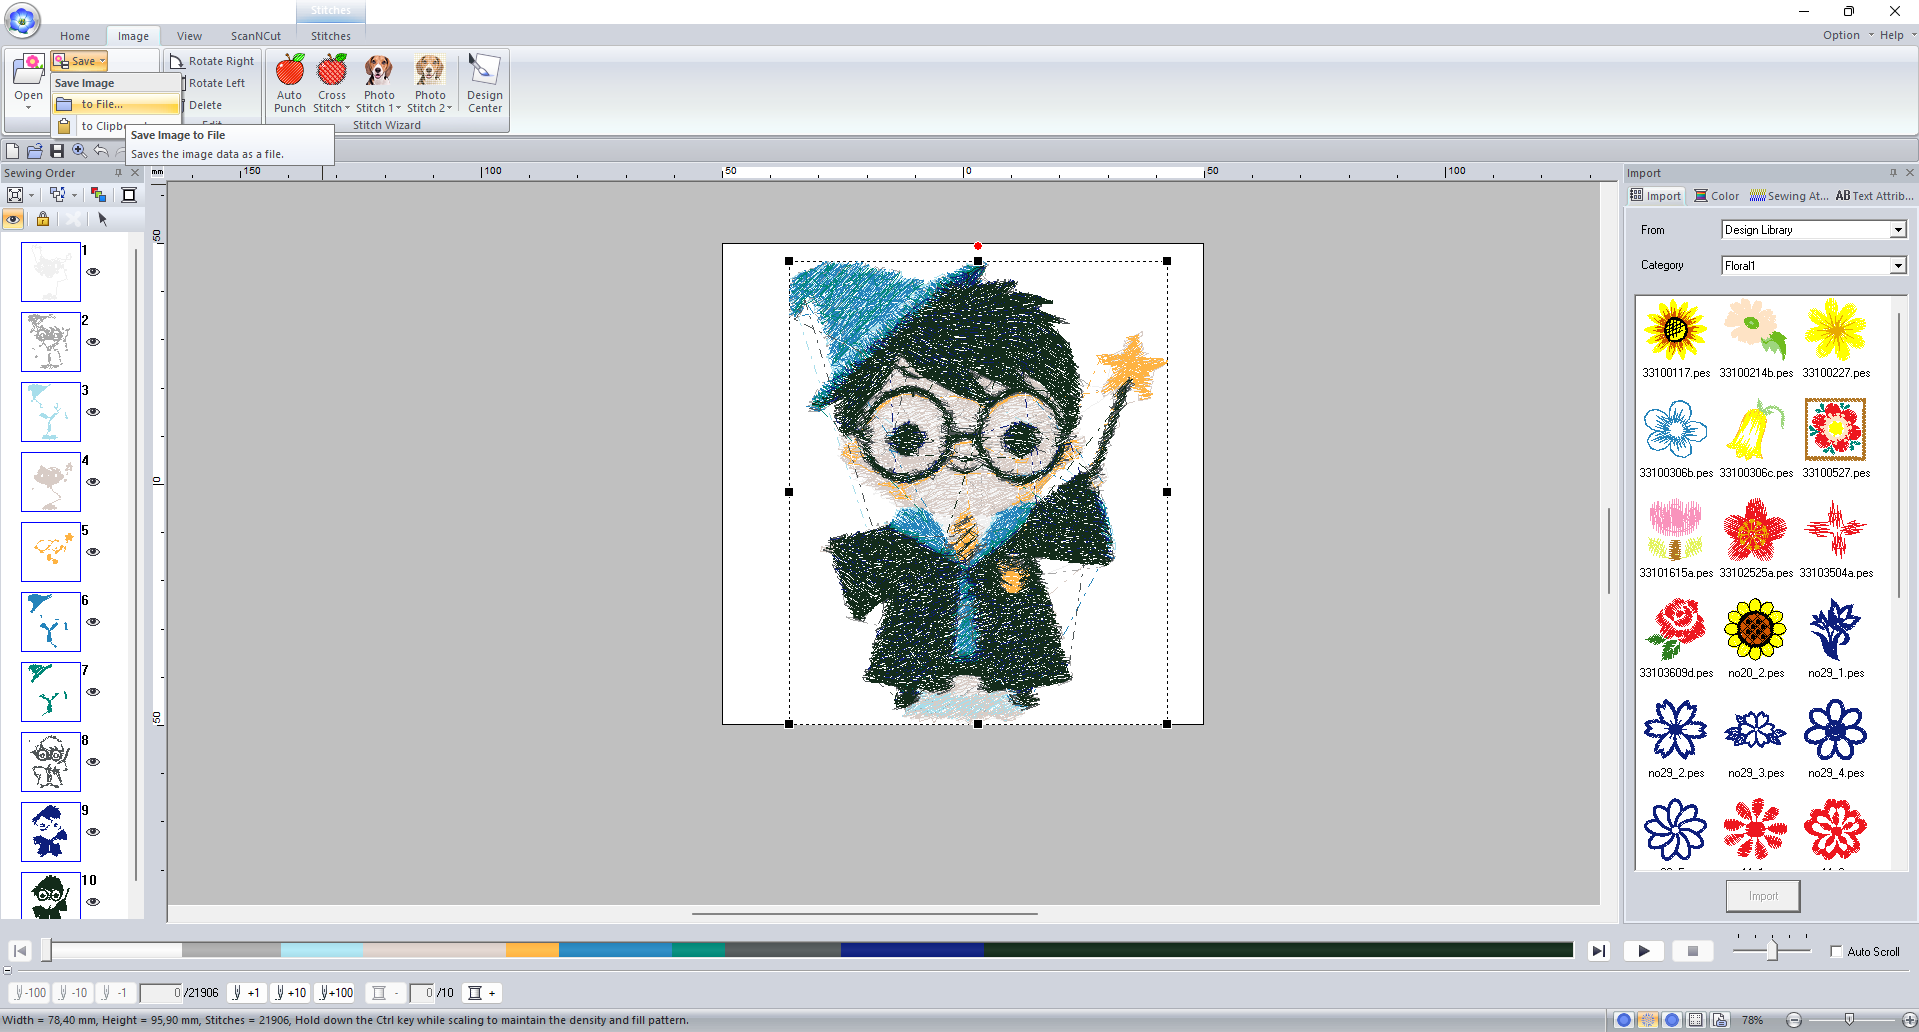
- Step 13 : Lastly You will see result of desing. You can connect your device and implement it your apparel or you can export it.